Menu:
Appetizer: Spinach and Artichoke Dip with Carrots, Celery & Pita
Salad: Spinach Salad with Apple and Red Onion
Dinner: Maple Pork Tenderloin & Sweet Potatoes w/ Cinnamon Butter
Drinks: Homemade Sangria
Dessert: Triple Chocolate Chunk Cookies (aka Heaven)
I had some girlfriends over the other night for what is turning into our weekly dinner party! It has been so much fun looking forward to these get-togethers. I find myself searching for recipes throughout the rest of the week for the next dinner party. This time I decided to break away from my comfort of / dependence on cooking chicken. I know it is always a safe alternative. Although chicken can be tricky, since you have to cook it until it is completely done, it is the one meat that I can say I am the most confident in making. I have caught onto the exact time it takes to grill, roast and saute. When I came across the recipe for the pork tenderloin I was a bit apprehensive. I found myself thinking, "Am I reallly ready for such a jump in the kitchen?" After a bit of pondering I decided that I was. I always love it when my parents cook tenderloin at home so I gave it a go. The one essential kitchen utensil for the pork tenderloin that I didn't have at home was a meat thermometer, so I had to add that to my shopping cart when I went to the grocery store. While it was an extra ten dollars added to my bill, I knew it would come in handy in future cooking endeavors as well, so it didn't hurt quite so bad. As soon as I got home form the store I began to marinate the pork in a plastic ziplock bag. While I wish I had thought ahead enough to get the meat the night before my party, it was perfectly flavorful after only marinating for 5 hours. My friend Kaitlin brought over one of my favorite appetizers of all time, spinach and artichoke dip. Leanne brought homemade sangria and Brianna brought absolutely delicious triple chocolate chunk cookies. Amanda brought some pepper (I told her to just relax this time as she made us dinner the last time we had a dinner party). The night was so much fun and I got some really awesome recipes from good friends :) Enjoy!
Spinach and Artichoke Dip
Currently still waiting on this recipe :) I will update as soon as Kaitlin sends it to me!
Homemade Sangria:
I didn't take any pictures of the sangria, which is a shame because it was really pretty :) I also didn't get the exact recipe but Leanne said it was basically a bottle of red wine and a few splashes of peach schnapps. She added limes, lemons and oranges to hers, but the beauty of sangria is that you can add any fruit you want!
Spinach Salad with Apple and Red Onion
This is one of my favorite salads from my mom's recipe collection. It is the perfect amount of tangy mixed with sweet. She found this recipe on
foodnetwork.com, at the bottom of a webpage for a recipe for pasta with pumpkin and sausage (which is another of my all-time favorites, especially during fall and winter!) We both make the salad all the time though, as the flavors mesh well with meals from any season.
Ingredients:
1 lb triple-washed spinach, de-stemmed (I bought Publix brand)
1 small Golden Delicious apple, quartered, cored and sliced
1/4 small red onion, thinly sliced and separated
1/4 cup olive oil
1 1/2 tablespoons apple cider vinegar
1 teaspoon grain mustard
1 tablespoon honey
Coarse salt and black pepper to taste
Directions:
Place spinach, apple, and onion in a salad bowl. Place oil, vinegar, mustard and honey in a small mixing bowl. Whisk the dressing ingredients with a fork until combined. Pour dressing over salad immediately and toss. Season with salt and pepper, to taste.
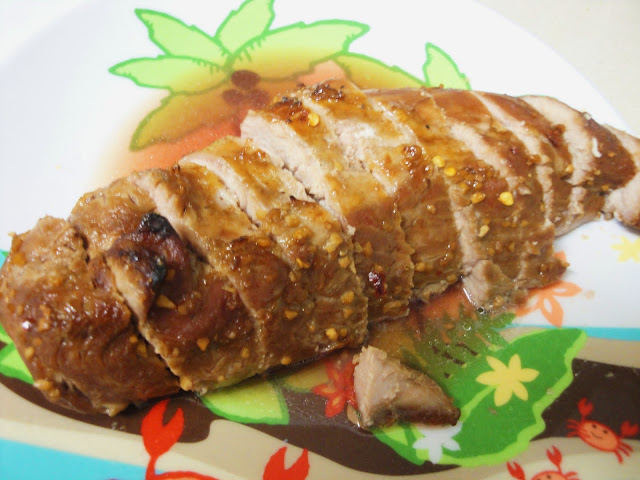
Maple Pork Tenderloin & Sweet Potatoes w/ Cinnamon Butter
Maple Pork Tenderloin:
Ingredients:
2 pork tenderloin (approximately 1.5-2 lbs together)
2/3 cup pure maple syrup
1/4 cup soy suace
1/3 cup teriyaki sauce (I used Ken's marinades)
1 tbsp finely minced garlic (I used the bottled, pre-minced garlic)
1 tsp pepper
1/4 tsp crushed red pepper
Yield enough for 5 people
Directions:
1. Put pork tenderloin in a ziplock bag. In a separate bowl, mix all the remaining ingredients and pour into the ziplock bag. Marinate for as long as you can. (I marinated for about 5 hours, but overnight would be best.)
2. Remove pork from the plastic bag and grill or bake in a 400 degree oven until the pork reaches an internal temperature of 145 degrees (Check after 20 minutes, and then keep checking every few minutes after if the temperature is not correct after the 20.)
3. While the pork is cooking, boil the remaining marinade in the bag for at least 10 minutes.
4. After you take the pork out, let it sit for about 5 minutes before slicing. Once that time passes, slice and serve with the marinade as a sauce.
Sweet Potatoes with Cinnamon Butter
Ingredients:
1/2 cup butter, softened (I used "I Can't Believe It's Not Butter")
2 ounces granulated sugar
2 ounces brown sugar
4 teaspoons ground cinnamon
Large sweet potatoes (I used 5)
Directions:
1. Preheat oven to 400 degrees.
2. Mix and stir all ingredients (besides the sweet potatoes) until smooth. Put into a tupperware, close lid tightly, and then place in refrigerator as soon as possible.
3. Put tinfoil on a cookie sheet and then place the sweet potatoes on top of it. Place cookie sheet carefully onto the bottom rack of your oven. Leave in for about an hour, checking with a fork how soft the insides are as it gets closer to the end. The time will vary with how small/large the potatoes are. The skins should look wrinkled and there should be a sticky substance coming out of the bottom of the potatoes.
4. Enjoy :)
**The cinnamon butter tastes wonderful for breakfast the next day spread on toast!
Triple Chocolate Chunk Cookies
These cookies literally melt in your mouth. Here is Brianna's recipe for them that she sent me.
Ingredients:
-16 ounces semi-sweet chocolate, chopped (or use chocolate chips) **I use bakers semi sweet chocolate
-1 stick (½ cup) unsalted butter
-1 1/3 cups all-purpose flour
-1 tsp baking powder
-1 tsp salt
-4 large eggs
-1½ cups (packed) light brown sugar
-2 tsp pure vanilla extract
-2 packages (24 ounces) semi-sweet chocolate chocolate chunks (or chopped chocolate)**I used one bag of regular chocolate chips and one bag of white choc chips (but only needed 1 and a half bags total because it was way too much)
**I added 2 tsp of instant coffee powder, but this is optional. It helps bring out the chocolate flavor
Directions:
1. Preheat oven to 350°F. Line baking sheets with parchment paper.
2. Place chopped chocolate (Bakers) and butter in a large, heatproof (metal or pyrex) bowl set over a pan of simmering water. Stir until melted and smooth. Add the chocolate slivers it in batches, it will be a bit quicker.
3. In another bowl, whisk together flour, baking powder and salt; set aside. Make sure to sift the dry ingredients for lumps
4. In a large bowl, with electric mixer beat eggs, brown sugar and vanilla on high speed until light and fluffy. Reduce speed to low and beat in the melted chocolate mixture. Then mix in dry ingredients and blend just until combined. Stir in chocolate chunks(as many as you like)
5. Drop heaping Tablespoonfuls of dough onto baking sheets, keeping a round shape as much as possible- 2 to 3 inches apart.
6. Bake until cookies are shiny and crackly, yet still soft in the center, 12 to 14 minutes. Cool on cookie sheets for about 10 minutes before transferring to a cooling rack with a spatula. I only had to cook them for 10 minutes so watch them! :)
Yield: About 4 dozen
I am so excited about all of the new recipes I have been finding and getting from friends. We will definitely be keeping up with our newly found tradition of dinner parties once a week, so check back often!
xox, Jen